Showing posts with label Fotobella Design Team. Show all posts

Monday, June 26, 2017

Carta Bella Are We There Yet Mini album

Anyone made a paper bag album lately?  Now that school's out, I've got these paper lunch bags taking up space in the pantry so I'm putting them to good use along with my scrapbook supplies.  Paper bags albums make great quick little albums and are perfect to give to your kids to document vacation adventures.


Are we there yet?  I mean who hasn't heard that question from your kids when traveling?  It's the perfect title for a vacation collection and Carta Bella's got it with their "Are We There Yet?" collection.  Apryl here with the FotoBella Design Team sharing my latest design project featuring this great collection found at FotoBella.com.


Visit blog.fotobella.com to see all cute details in these albums!
Have a happy summer!


Thursday, April 27, 2017

Go Team with BoBunny Game On

Hello there!  I have a couple of layouts featuring one popular team sport, Soccer with two of my favorite companies:  BoBunny & FotoBella.com!  My youngest daughter started playing soccer when she was two.  A very informal team that basically gets the kids running the field and learning the basic concepts.  Man do I have some cute photos from that! Soccer and sunglasses go hand in hand for this cute little girl out on the soccer field!


A couple of close ups of how I implemented journaling.         


The layouts are made with BoBunny's Game On! Collection from FotoBella.com  I designed both layouts separately, but may decide to match up in the album as a double layout.  That may involve a little tweaking of the pages later so that they are a good match.  But that's all part of the fun of designing and crafting :)

As you can see the design is consistent with the soccer ball print paper and torn edge of the blue paper.  Inked the edges with dark brown ink (Quick Quotes Java) and added the dark blue rhinestones along with a few pearls.  There's alway a way to add the glam factor :)  


Here you can see the pennant banner is accented with rhinestones.  


A mixture of the chipboard stickers and pieces from the Noteworthy packet make up the embellishment collage.  And on the second layout I again added journaling to the Noteworthy pieces as well as creating a journal box below the collage with doodling.  BoBunny has created the perfect collection for highlighting your children's sport photos.  You should check it out at Fotobella.com.  You'll find that it will work for many sports, not just soccer.  

Thanks for stopping by today and have a fabulous day!  


Wednesday, March 15, 2017

Hello Love Layout with Simple Stories Love and Adore

Hello there, today I'm sharing a FotoBella's design team  project with you.  I don't know about you but I can't get enough of this cute Simple Stories Love and Adore collection.  


 I had to use this background paper because I just love it!  And it didn't take much to pull this layout together. I chose a 4"x6" photo of my two cuties from a few years ago and cropped it down to 3"x6" I then double matted it with black and white cardstock.  I kept the white border thicker so that I could embellish it with the enamel dots.  The title "Hello Love" is from the Chipboard sticker pack along with the flowers and the hearts.      
                            
                                       
I also added fun embellishments below the photo. 


 Sometimes you may see my layouts with journaling and without.  I do plan to add some journaling in the white space area, but I've found that for me, its better to do that later.  I prefer putting the layouts into the book, and then journal to help create a storyline and good flow between layouts.  Otherwise, I  have found that my journaling gets repetitive and boring....names, date, occasion with generic captions because I can't think of something else to write.  Does that seem to happen to you?

Hope you found some inspiration today and find yourself busy crafting with Simple Stories Love and Adore collection from FotoBella.com

Have a fabulous day!


Thursday, February 9, 2017

Well Hello!  I know this may be shocking you right now, a new blog post popping up on my blog today?!? I know, I know, I've been MIA!  But trust me, with good reason!  The last half of 2016 was spent designing and making page kits for FotoBella as well as my husband and I deciding to sell our house to buy a new one that better suited our families needs and well, move in December, just before Christmas!  Now, wouldn't you know it's February already and Valentine's Day is right around the corner!?!

I'm so happy to say that I'm back at the crafting table, in my new craft studio (hooray!) and designing projects for FotoBella :)  Today it's with the fabulous 
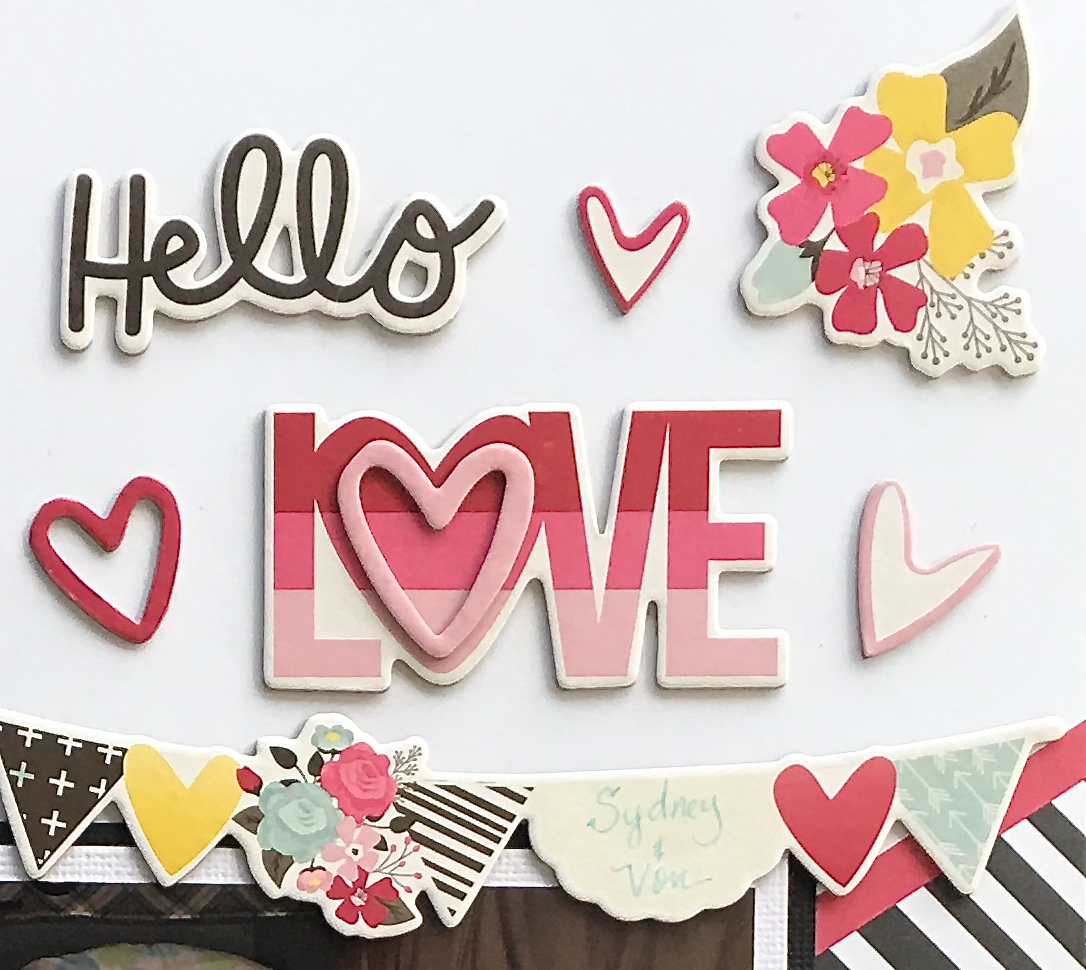
Simple Stories Love & Adore collection which can be found at FotoBella.com and is just the right collection to inspire some "love"ly crafts!


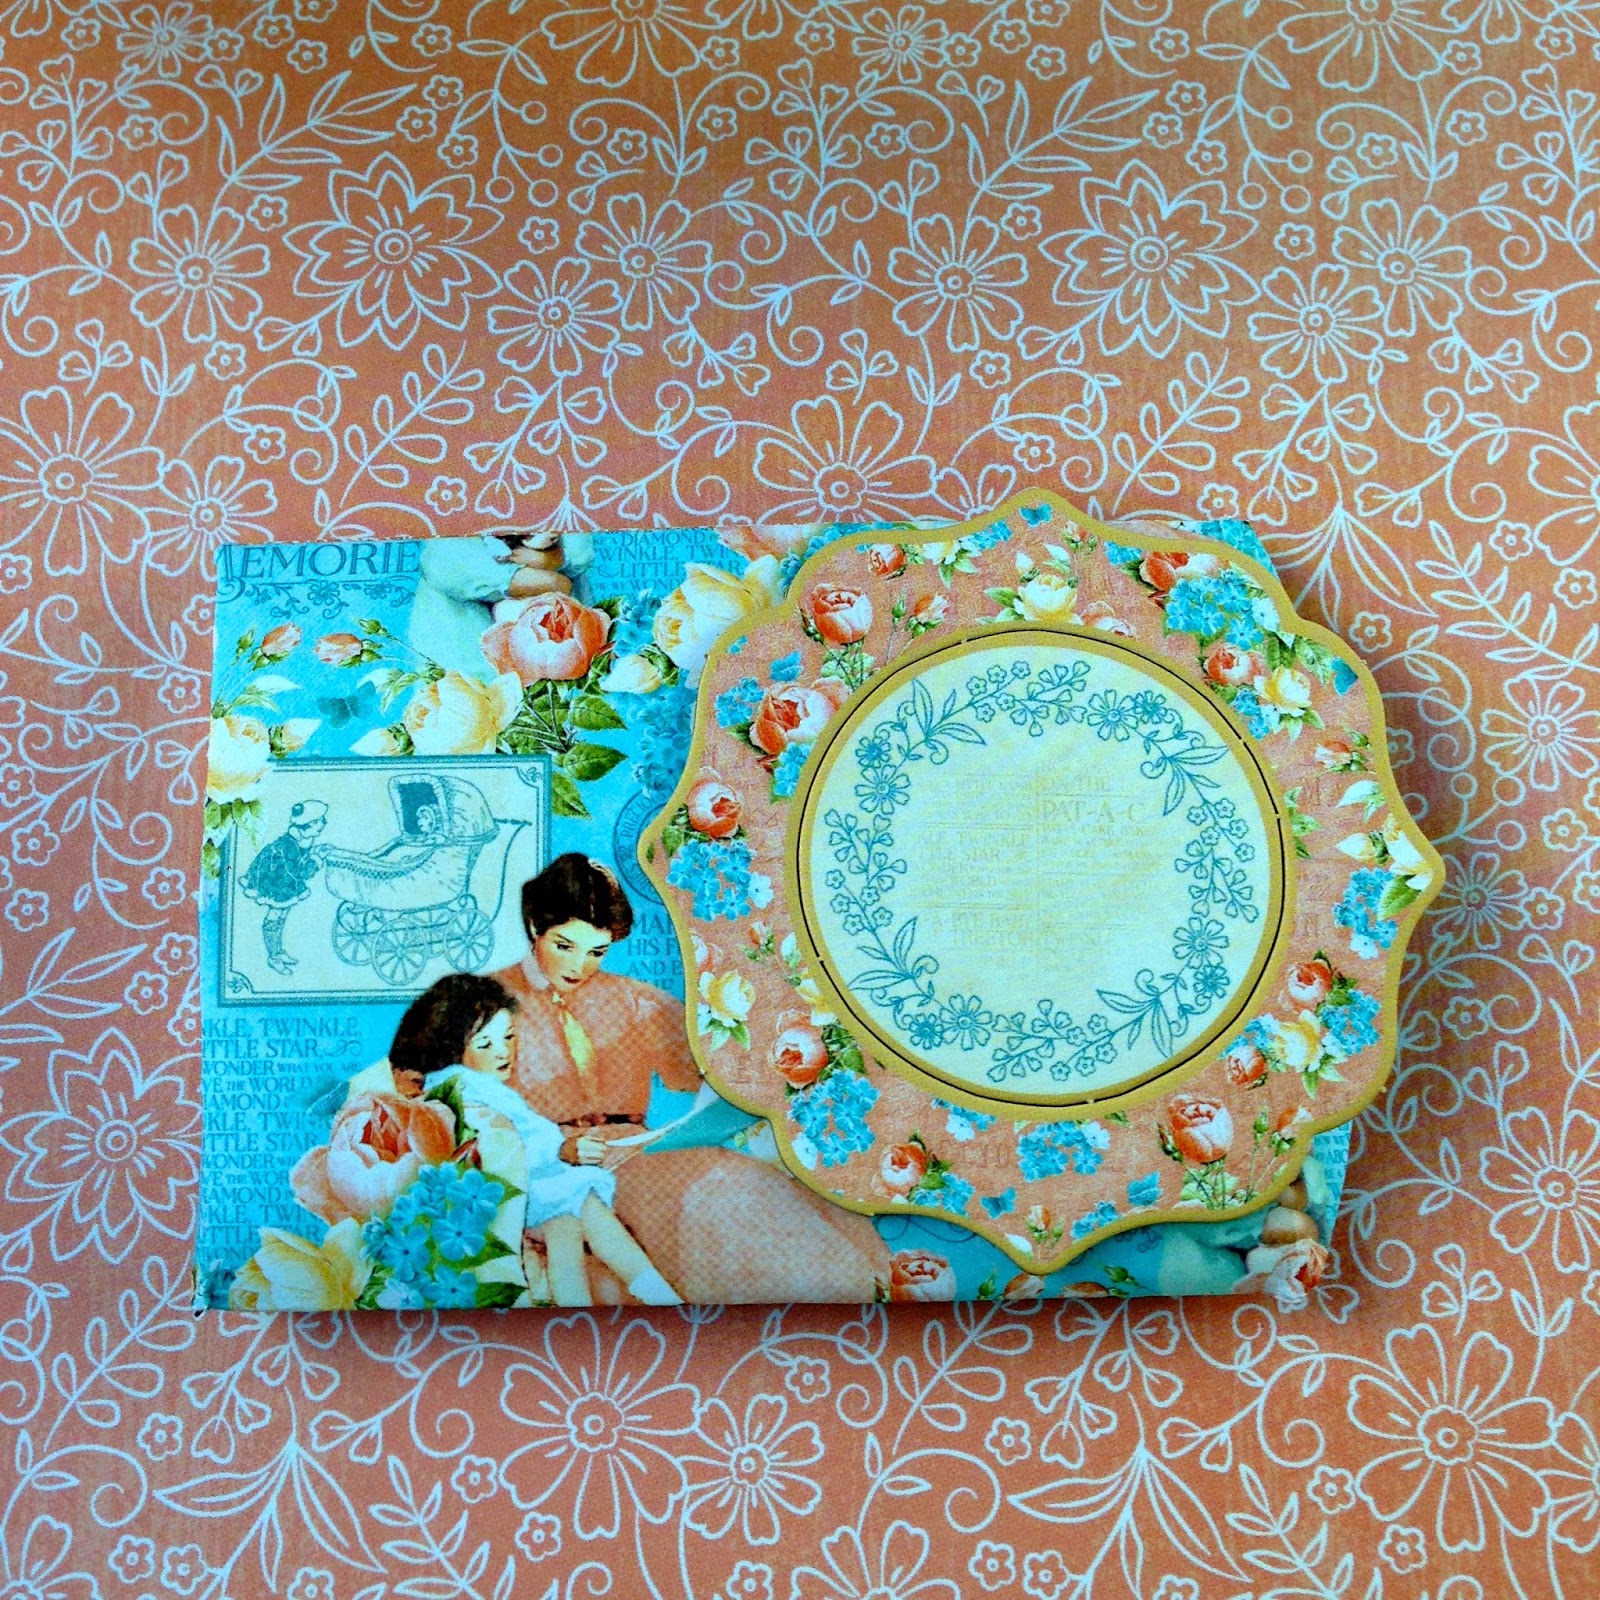
I've got a confession, every year around this time, the dollar spot at Target has these cute little tin mailboxes, and every year I buy some....and this is year I finally use them in a project!  I'm sure many of you can relate :)  For this project I'm using the Simple Stories Love & Adore collection to embellish a turquoise and white mailbox.

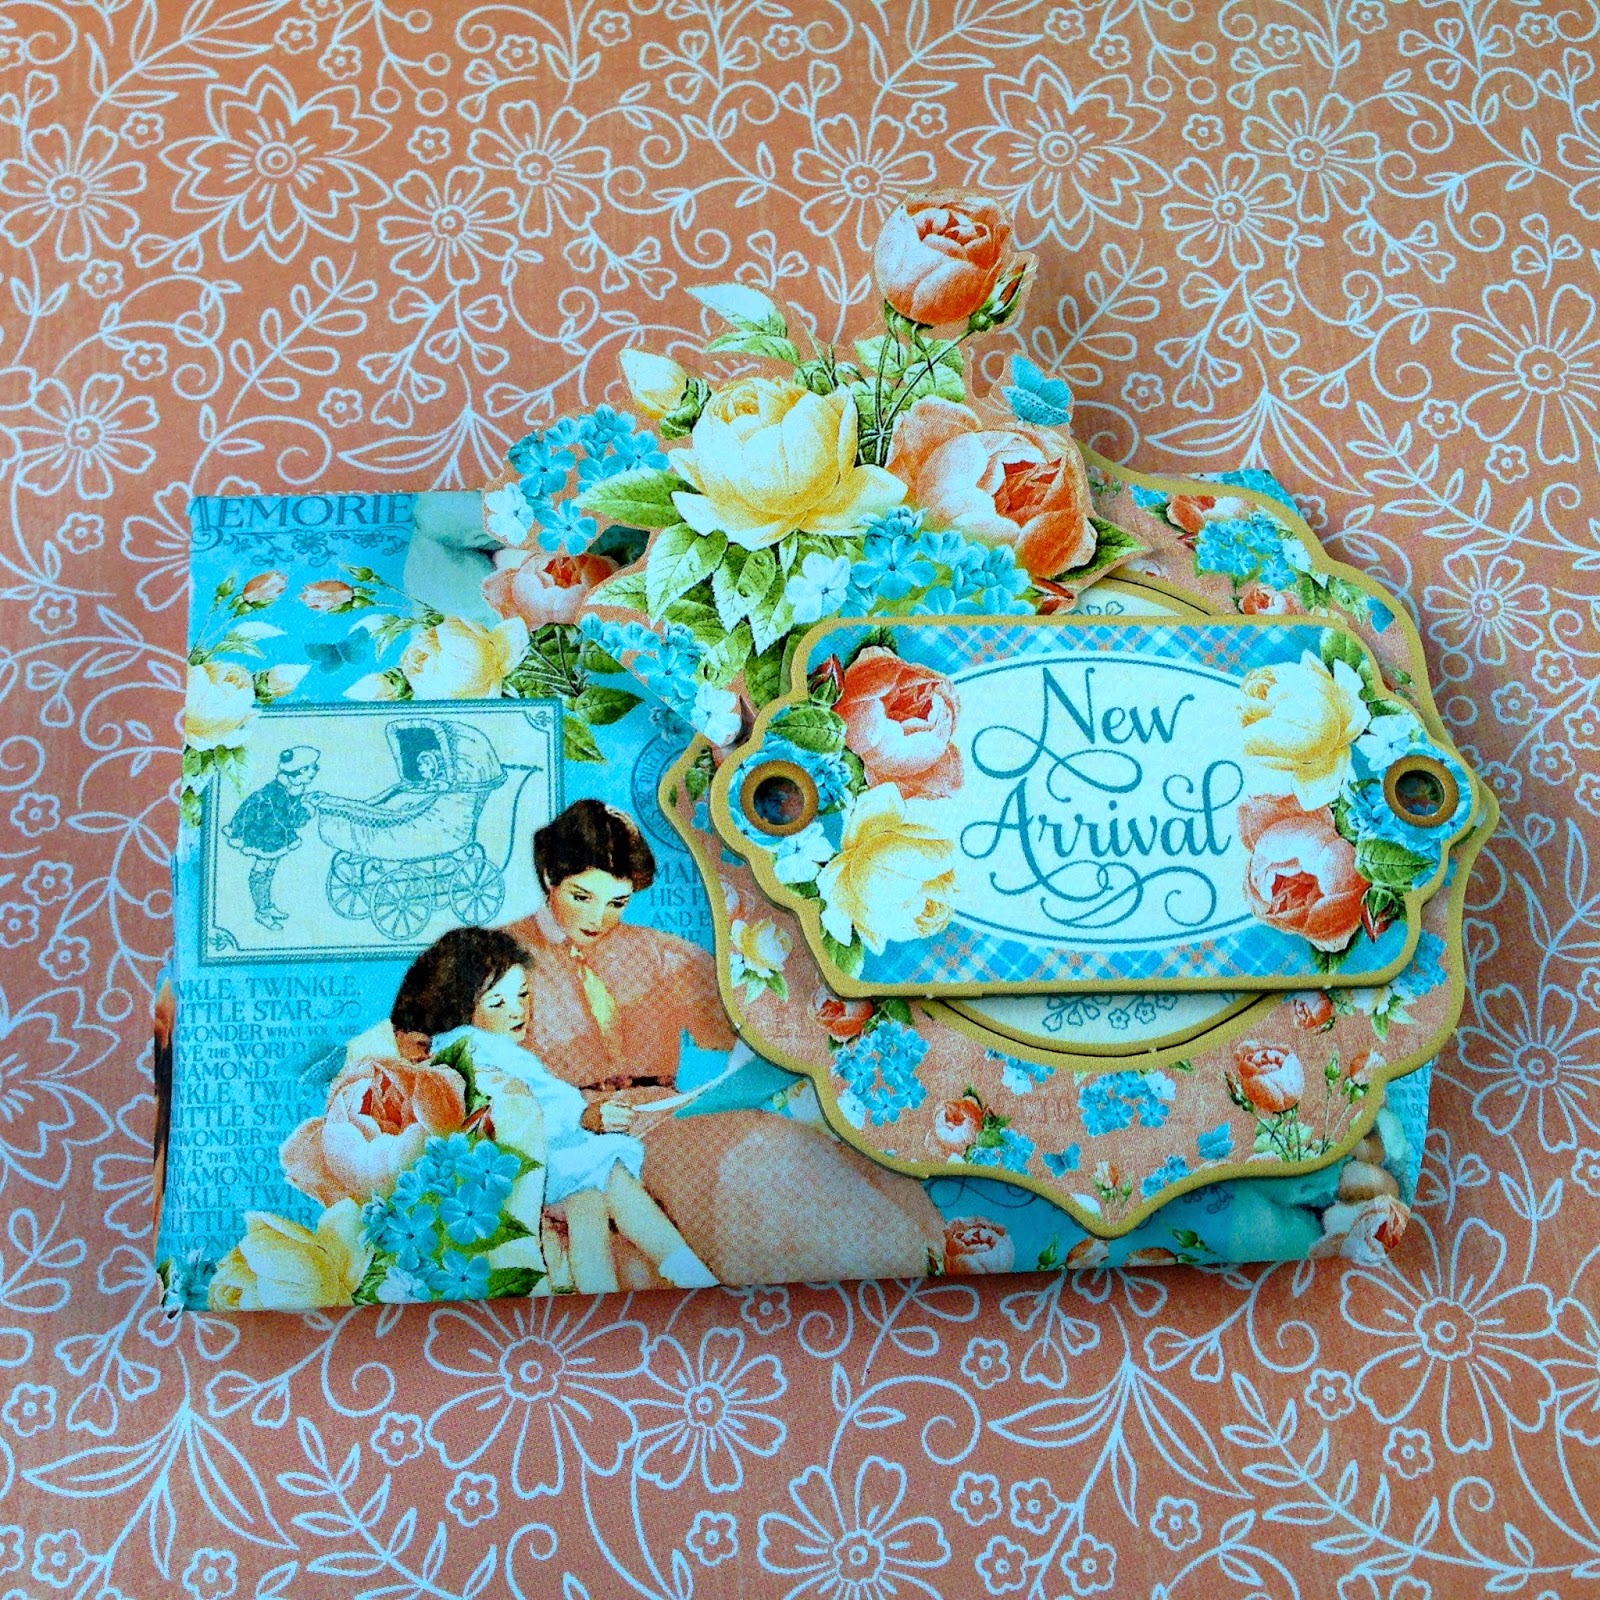
This is really a fast and easy project and just so cute!  Perfect for the kiddos to take to school for their Valentine exchange or to tuck a few Valentine goodies of your own to give as gifts.


To start, I cut a piece of "So Happy Together" paper and "Elements" Paper that measures 12"x4" so that it would wrap around the body of the mailbox.  It really fits perfectly, but one thing worth mentioning is that you do have to cut a notch out so that the flag on the mailbox is not covered up and moves properly.


For the embellishments, I sorted through the Card Stock Die Cut Ephemera Bits and Pieces. The sizes of these pieces are just right for this project and there are lots of pieces to choose from.  I layered them up and added a few enamel dots and some twine.  It really is that simple, but that's what make working with Simple Stories products so awesome :)  Find them here at FotoBella.com


So happy to share my first design team project for the year with you!  Looking forward to many more!


Monday, July 4, 2016

Patriotic Pinwheels with We R Memory Keepers

Happy Fourth of July!!  I've popped in to the blog today to share a quick and fun patriotic project using We R Memory Keepers Pinwheel Punch Board. It's a great way to come up with some fun decor in a snap.  The punch board is really easy to use.  Cut your paper in a square anywhere from 3" to 12", punch the corners with the punch in the top right hand corner of the board.  Then you line up your paper according to the size guides so that you can cut the slits that allow you to fold over the pinwheel pieces.  The secure the pinwheel, use a brad in the center.  


The pinwheels can be attached to a stick and spinner also made by We R Memory Keepers http://www.fotobella.com/We-R-Memory-Keepers-Pinwheel-Attachments_p_45249.html


I attached my to an adhesive foam board so that I can use it as a back drop.  


The paper I sued is from my scrap stash.  Some of the brand paper is Doodlebug, Simple Stories and My Mind's Eye Necessities paper pack.  Be sure to visit Fotobella.com for some shopping this weekend so you don't miss out on the 4th of July 20% off sale!  

Have a safe and fun holiday!  


Tuesday, December 8, 2015

Awesome Times Basic Grey Sunkissed Layout

Let's take a step back from the holiday hub bub shall we?  And rewind to fun summer and spring colors with Basic Grey Sunkissed collection from FotoBella.com.  This collection is really cute and I love it!


I dug up some really adorable photos of my two loves on their first day of school.  My daughter was being super supportive of her brother's first day of preschool and these photos have captured that fabulous day!  


There was so much I wanted to use from this collection, that I just went to town with the layers to incorporate it all.  I've got some tearing going on with the neutral background and I punched the large sunburst shape with one of my Lucky 8 Punches!  Who has those?  Aren't they fun?  


You'll find some great cork stickers in the Sunkissed collection.  I layered this one on a piece of black card stock, added black diamond Stickles and a scalloped circle.  


Here's a great view of the fun layering and the tags I added with some twine.  Go to FotoBella.com and check out this bundle for yourself.  It's a blast to play with!

Have a fabulous day!


Thursday, December 3, 2015

Bo Bunny Dear Santa Treat Bags

Happy Holidays, I'm sharing a  FotoBella's design team  tutorial on how to make this cute bag on the FotoBella blog today!  Go check it out!  Looking for a fun way to package some holiday goodies?  Do you have any brown paper lunch bags hanging around in your cabinets?  Mix a couple of lunch bags with Bo Bunny's Dear Santa I Want It All Bundle from FotoBella.com and you've got yourself some really cute holiday goodie bags.


Supplies Needed:  Dear Santa Bundle-Gift tag paper, Ephemera pack, Combo Sticker Sheet
                               Adhesive, Dark Brown Ink, Twine, brown lunch bag

Tools:  Scissors, Ruler, Big Bite or Crop a dile (hole punch)


 Bo Bunny Dear Santa bundle


Once you get started, you'll find it to be pretty simple, and want to make several like I did!   Have fun making endless design combinations!  Don't forget to get your Bo Bunny Dear Santa Bundle before it's too late!

Happy Holiday crafting!


Tuesday, November 17, 2015

December Stories with Bo Bunny Dear Santa

The holiday season is fast approaching and I've been busy crafting with the  Dear Santa Collection by Bo Bunny at FotoBella.com.  Let's be honest, the holidays are always arrive, before we are ready and are over in a blink of an eye.  This layout I'm sharing today is one I had to play "catch up" with from a Christmas past.  

Dear Santa is a bright and colorful collection that partners perfectly with some Christmas photos of mine from 2009.  I had started a layout with these photos awhile ago but the layout needed it's second page before going in the album.   


Papers used from the collection:  Dear Santa, Wonderland, and Festive.
Photos Sizes used:  (2) 4x6 and (4) wallets.


I created the large shape using my Creative Memories Large Bracket from their cutting system.  The same thing can be done with your Silhouette, Cricut, Super 8 punches, etc.  Use your favorite shape and matte with a solid color cardstock to make it pop!  If you want to get a lot of photos on one page, creating a collage, like I did here, is a great way to do so.  


I kept the embellishments simple for this layout, since they are a lot of patterns in the paper.  The star border along the bottom is from the layered chipboard pack as well as the "December Stories" banner at the top of the collage.  

Preserve your memories of Christmas past or present with the fun BoBunny Dear Santa I Want It All Bundle from FotoBella!  You will love this collection as much as I do!

Have a fabulous day!


Wednesday, September 23, 2015

Spooky Halloween Tree

I LOVE Halloween!  Given the chance to work with My Minds Eye Something Wicked Bundle from FotoBella.com meant decorating in September, Eeeeek!  So fun!  I've been dying to decorate since spooky items started showing up on the Michaels shelves this summer.  I couldn't resist buying a twisted, spooky tree from Michaels.  To decorate it, I used the Mixed Bag from My Minds Eye Something Wicked.  Using my tag punch, I made tags with various printed papers and layered them with embellishments.  


I love the black glittered pieces.  They look so cool!  


This cat I added the mustache to is my favorite tag.
=


There are plenty of spooky elements that I left the way they were like and just punched them into tags.  


I inked the tags with black ink and hung them all over the tree.  


I think it looks pretty spooky, how about you?  

Have a Spooky day!


Thursday, July 2, 2015

Bo Bunny Juliet Card


One of my new favorites (I seem to have a lot of those :) is Bo Bunny's Juliet collection.  Thanks for FotoBella.com this was the bundle that I received for Design Team projects this month and the collection is really amazing.  I recently made a card and the full tutorial is featured on FotoBella's blog if you want to check it out.  


One thing to note about this card, it is made almost entirely with the Ephemera pack that come with the Juliet collection.  The paper, embellishments with two exceptions are right out of the Ephemera.  The key and the layered chipboard sticker are the exceptions.  


Here's a detailed closeup.  The colors and flowers are really beautiful, don't you think?  


Thanks for stopping by and have a fabulous day!


Friday, May 29, 2015

My Princess Simple Stories Enchanted Layout

Apryl with FotoBella Design Team sharing another Simple Stories Enchanted layout featuring my princess as she poses in the Fancy Nancy tour bus we had the pleasure of seeing while at the author's book signing.  I enjoyed adding all the little details in this layout.  See how many fun things you spy.  


I layered just a few patterned papers and then went to town with the cute embellishments.  I love the chipboard cloud sticker and especially the silver foil chipboard "princess" sticker.


I added butterflies, a crown, the journaling box from the and paper wash.

Tuesday, April 28, 2015

Graphic 45 Precious Memories Pillow Box Tutorial

Welcome to the blog today!  For the FotoBella's design team, one of my recent tutorial projects was using Graphic 45 Precious Memories I Want It All Bundle to make a pillow box.  

      Supplies Needed:
  • Pillow Box template from Graphic 45 paper pad
  • Cherish 8x8 paper
  • Baby's Breath 8x8 paper
  • Precious Memories Chipboard Journaling & Decorative
  • (1) Pearl Brad
  • Graphic 45 Cream Sheer Ribbon
  • Graphic 45 Dark Blue Sheer Ribbon
  • Diamond Stickles
  • Scissors
  • Glue


Let's get started!

Step 1:  Go to the back page of the 8x8 paper pad to find the pillow box template and cut it out.


2.  Choose the Cherish 8x8 paper and trace the template on to it.


3.  Cut out the template, score and fold it according to the lines on the template.


4.  Apply glue to the tabs that are folded in, leaving one end of the pillow box so that it opens.


5.  To embellish the front of the pillow box, select this chipboard design and glue to the front of the pillow box.


6.  Select the "New Arrival" Chipboard piece and glue it on top of the previous chipboard piece.


7.  Select the Baby's Breath 8x8 paper and fussy cut two bunch of flowers to tuck behind the chipboard.


8.  Add a pearl brad to the left end side of the "New Arrival" chipboard piece.


9.  Select the two pieces of ribbon and layer them, feed them through the hole on the right hand side of the "New Arrival" chipboard and tie a bow.  


10.  Add Stickles to some of the flowers to make them sparkle.


And here you are, with a beautiful pillow box ready to be filled with something fabulous!  

Thanks for stopping by today and hope you have fun making your own pillow box.  Find the complete collection of Graphic 45 Precious Memories at FotoBella.com

Have a fabulous day!